
Best Hornet Mk II Variant and Loadouts in Star Citizen 4.10.1
If you're picking up your first Hornet Mk II with in-game aUEC, your best entry point is buying the base F7C and adding the Anvil F7C-M Mk II Ball Turret. It gives you the cheapest base hull in the family. From there, you can slap on the standalone S2 nose turret once you're ready for a full six-gun array. If hauling crates takes priority over center firepower, hang onto the stock 2 SCU cargo module instead of fitting the center turret.
If you can manage to get your hands on one, the F7C-M (Super Hornet) offers the most protection and equipment in this lineup, giving you a third shield generator, extra missiles, and a passenger seat, though you give up a bit of handling agility. If you already own an F7A, keep it as your dedicated solo dogfighter. Be careful not to mix up your reward paths: completing the "Wikelo Navy F7" contract awards the F7C-M, whereas Pyro's Executive Hangar can award the F7A as part of a randomized reward pool.

Published: · Applies to: Alpha 4.10.1 LIVE
Which Hornet Mk II fits your flying?
| Variant | Choose it for | Standard maximum gun fit | Buy or earn in game |
|---|---|---|---|
| F7C | Lowest purchase cost; optional 2 SCU cargo | 2 × S4 + 2 × S3 + 2 × S2 | New Deal, Lorville: 4,650,340 aUEC |
| F7C-S (Ghost) | Low-signature approaches | 2 × S4 + 2 × S3 + 2 × S2 | New Deal, Lorville: 5,115,370 aUEC |
| F7C-R (Tracker) | Scanning role; combat compromises | 2 × S4 + 2 × S3 + 2 × S2 | New Deal, Lorville: 4,882,860 aUEC |
| F7C-M (Super Hornet) | Three shields, extra missiles, second seat | 2 × S4 + 4 × S3 | Wikelo Navy F7 |
| F7A | Solo handling over the F7C-M | 2 × S4 + 4 × S3 | Random Executive Hangar reward |
To max out your firepower on civilian variants, you'll need to equip both the center and nose turrets (mounting the center turret replaces the F7C's default cargo box). Note that every model referenced in this guide refers to its Mk II iteration.
If you prioritize protection and a second seat, go with the F7C-M (Super Hornet). It brings three shield generators, 15,250 hull health, eight S1 missiles, eight S2 missiles, and a co-pilot seat. You can fire all six weapons entirely on your own, but bringing a gunner lets you split weapon control without adding more guns. The trade-off is mobility—it is the least agile Mk II in this lineup.
The military-grade F7A runs an identical heavy armament—two S4 wing mounts paired with four S3 turret guns—backed by two shields and eight S2 missiles. Its handling edge is modest: while pitch and yaw stay identical to the F7C-M at 50°/s and 40°/s, its roll rate rises from 140°/s to 143°/s. Pick the F7A if that modest handling edge matters more to you than an extra shield and passenger seat.
The base F7C is your budget-friendly entry into the family, offering two shields and a 2 SCU cargo box right off the floor. Mounting store-bought turrets gives you more guns, though its smaller civilian nose mount stops short of the military versions' S3 pair.
If you prefer staying off enemy radar, the F7C-S (Ghost) is built for low-emissions flying. Its specialized Void armor applies a -28% modifier to infrared (IR), electromagnetic (EM), and cross-section signatures, while stealth components help keep emissions low. However, its stock dual Shimmer shields provide only 4,488 shield HP compared to the 6,336 HP on the standard F7C and F7A—you're directly trading raw durability for stealth.
Adding a center ball turret to the F7C-S won't lose you that armor signature modifier, but the added equipment still produces emissions. Keep in mind that detection ranges depend on the other ship's radar, your power state, and your angle of approach, so there isn't a single magic distance you can always rely on.
For pure dogfighting, the F7C-R (Tracker) is harder to justify. While it retains two shield slots, it suffers from weaker armor and a smaller hydrogen fuel tank (holding just 3 SCU compared to 4 SCU on other variants). Base armor health sits at 3,080 HP versus 6,600 HP on the F7C, F7C-M, and F7A. The radar dome also occupies the center slot, so adding a turret means removing it. With the dome's practical scanning advantage still unclear, combat-focused pilots will find the cheaper F7C a better deal.
For a deeper look into how damage per hit interacts with armor, check out our Star Citizen ship armor guide.
Which turret to buy and where to get it
Recommended center turret: Anvil F7C-M Mk II Ball Turret
When outfitting an F7C, F7C-S (Ghost), or F7C-R (Tracker), your main center upgrade is the Anvil F7C-M Mk II Ball Turret. Don't let the name confuse you—it drops right onto all three civilian Mk II hulls and is the top turret for every civilian build listed below.
You can pick one up for 115,330 aUEC at any of these outlets:
- CenterMass in New Babbage.
- CenterMass in Area18.
- Cousin Crow's in Orison.
Look specifically for the Anvil F7C-M Mk II Ball Turret. It holds two S3 weapons and a missile rack. The Size 5 rating applies to the turret itself, so you'll still want a pair of S3 guns when shopping for your loadout.
Installing it replaces whatever is currently sitting in your center slot:
- F7C: Replaces the 2 SCU cargo box (keep the box installed if you rely on it for cargo or loot runs).
- F7C-S: Replaces the center cover plate while preserving your Void armor stealth modifier.
- F7C-R: Replaces the radar dome, effectively giving up its dedicated scanning setup.
Optional nose turret: Hornet Mk II S2 Nose Turret
To squeeze two additional guns out of a civilian frame, grab the Hornet Mk II S2 Nose Turret for around 20,250 aUEC at ship weapon stores. Check UEX for sellers before traveling. This is a standalone mount that holds two S2 weapons—just make sure the item name explicitly specifies Mk II and S2.
If you're already flying an F7A or F7C-M (Super Hornet), hang onto their factory center and nose turrets for the six-gun builds below. Both positions come standard with dual S3 mounts. Note that the military-spec Hornet Mk II S3 Nose Turret isn't an ordinary store, loot, or crafting upgrade for civilian hulls.
Where to buy or earn each Hornet Mk II
You can buy the base F7C, F7C-S (Ghost), or F7C-R (Tracker) straight off the floor at New Deal in Lorville for the prices listed in the table above. Neither the military F7A nor the F7C-M (Super Hornet) are sold in standard ship shops. To get the F7C-M, you'll need to complete the Wikelo project detailed below; for the F7A, you'll have to brave the Executive Hangar run.
Outfitting a base F7C with both store-bought civilian turrets comes out to roughly 4.79 million aUEC before weapons. That gets you the hull and mounts for a six-gun Mk II without having to grind rare drops or fight over contested zones.
Keep in mind that rental options remain unconfirmed, so plan on buying or earning your ship outright. The F7C, F7C-S, F7C-R, and F7C-M also pop up on the pledge store during rotational sales. Ships bought in-game or earned through mission rewards generally survive routine patches and remain claimable through ASOP, but a full database wipe can remove them. Pledge ships and applied web upgrades are permanently tied to your account.
Heartseeker, F7X, and Mk I ships
The F7C-M Heartseeker Mk II is a limited variant featuring themed paint and a TMSB-5 top turret loaded with twin S4 ballistic gatlings. If you already own one, it's worth flying for that unique hardware, but limited store availability and reports of post-claim turret bugs keep it out of our default loadout picks. Under the hood, it retains the exact same flight specs and shield slots as the standard F7C-M.
The F7X is exclusive to Squadron 42 and cannot be acquired in the Persistent Universe. Lastly, older Mk I Hornets use different weapon mounts and purchase routes, so don't try applying Mk II loadout advice to legacy hulls.
Hornet Mk II loadouts for PvE and PvP
For general dogfighting, start with AD4B and Mantis gatlings against light and medium targets. Swap over to energy guns when you want to keep taking missions without restocking ammunition, or grab heavy cannons when enemy armor blocks smaller ballistic hits. Note that these represent base weapon stats—player-crafted versions will vary.
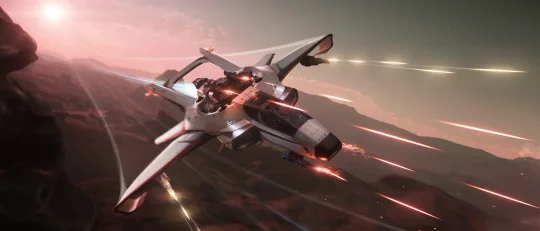
All of the F7A Mk II loadouts detailed below apply directly to the default F7C-M (Super Hornet) turret layout: two S4 wing mounts, two S3 center guns, and two S3 nose guns. For civilian variants (F7C, F7C-S, F7C-R), swap in the Anvil F7C-M Mk II Ball Turret for the center S3 pair, and add optional S2 guns on the nose. Only keep the F7C's stock cargo box if you're comfortable sacrificing those center hardpoints.
Check out our S2 and S3 ship weapon guide for center and nose choices, current pricing, and ways to get NDB repeaters.
AD4B and Mantis: the store-bought starting fit
- Wings: 2 × S4 AD4B ballistic gatlings.
- Center + nose guns: 4 × S3 GT-220 Mantis gatlings.
- Civilian adaptation: Same wings; 2 × S3 GT-220s in the center. Run two store-bought S2 ballistic gatlings on the nose, or leave the mount empty while saving up.
Both of these weapons can be bought straight off store shelves. AD4Bs run around 54,105 aUEC at HUR-L5, the Crusader Showroom in Orison, and CenterMass in Area18. Mantis GT-220s cost roughly 24,045–28,116 aUEC at shops including CenterMass and Cousin Crow's.
With projectile velocities sitting closely at 1,296 m/s and 1,332 m/s, your lead pips stay closer together than with the M6A/Panther setup below. High fire rates suit brief firing windows against fighters, and because they're ballistics, they draw zero power from your weapon capacitor. That makes it a useful starting loadout for light and medium targets in PvE or PvP.
Just keep an eye on your ammo counter: the AD4Bs hold 5,220 rounds each, while the Mantises carry 4,314. Heavy armor can keep those smaller hits from damaging the hull or components underneath, so swap to high-alpha cannons when your shots aren't getting through.
M6A and Panther: longer sessions without ballistic resupply
- Wings: 2 × S4 M6A Cannons.
- Center + nose guns: 4 × S3 CF-337 Panther laser repeaters.
- Civilian adaptation: Same wings; 2 × S3 Panthers in the center, and two S2 energy repeaters on the optional nose mount.
M6A cannons cost between 169,080 and 176,093 aUEC across major weapon shops, while Panther repeaters are widely sold. Each M6A shot delivers 615 damage, giving the wings a role against armor while the Panthers handle more erratic targets. Best of all, full energy weapons mean zero ammo restock runs.
Put your Panthers and M6As in separate weapon groups. Their bullet speeds differ—1,480 m/s for the Panthers versus 1,152 m/s for the M6As—meaning you'll have split lead pips. Use the Panthers to track fast fighters, then bring the heavy M6As to bear when larger or predictable targets line up within 800–1,200 meters. Give weapons priority during engagement passes, then rebalance while resetting.
If you have access to weapon crafting, crafted S4 CF-447 Rhinos match the Panthers' projectile speed much better at 1,440 m/s. If you don't craft, stick with the reliable shop-bought M6A/Panther combo.
M6A and M5A: matching cannons for armored targets
If you already have a set of M5As, running an all-cannon energy loadout keeps your projectile speeds closely aligned while delivering heavier individual hits:
- Wings: 2 × S4 M6A Cannons.
- Center + nose guns: 4 × S3 M5A Cannons.
- Civilian adaptation: Same wings; 2 × S3 M5As on the center mount. Run high-alpha S2 cannons on the nose, or bind them separately.
M6A and M5A cannons fire at 1,152 m/s and 1,184 m/s respectively. That keeps the lead pips close for deliberate shots at components on larger PvE targets. Hitting fast, evasive fighters with those slower rounds is harder.
If you prefer ballistic wings, swap the M6As for 2 × S4 Deadbolt IVs while keeping the S3 cannons. Deadbolts sell for around 128,145 aUEC in New Babbage and Orison, dealing 610 damage per shot at 100 RPM with 381 rounds. Make every trigger pull count by focusing damage on a single component rather than spraying ammo across crossing targets.
C-788 and Panther: deliberate weak-point shots
- Wings: 2 × S4 C-788 Cannons.
- Center + nose guns: 4 × S3 CF-337 Panther laser repeaters.
- Civilian adaptation: Same wings; 2 × S3 Panthers in the center, plus optional S2 repeaters on the nose.
C-788s go for roughly 135,265–140,876 aUEC and deliver a massive 975 damage per hit—the highest per-hit alpha of any S4 option here. Use the Panthers to pressure shields, then line up cannon shots at turrets, thrusters, or exposed components.
The catch is low capacity and a sluggish fire rate: just 50 RPM and 270 rounds per gun. Keep the C-788s bound to a separate trigger group due to projectile speed differences, and avoid using this setup for high-speed fighter dogfights—missing a shot leaves a long wait for the next heavy hit.
Revenant and NDB-30: an optional crafted fit
If you've spent time crafting or already have these guns sitting in inventory, give this hybrid build a try:
- Wings: 2 × S4 Revenant ballistic gatlings.
- Center + nose guns: 4 × S3 NDB-30 repeaters.
- Civilian adaptation: Same wings; 2 × S3 NDB-30s in the center. Add crafted S2 nose guns only if you've got matching recipes and verified stats.
Revenants dish out 1,266 base burst DPS with 3,660 rounds at 1,296 m/s. Paired with NDB-30s (1,258 m/s velocity), your lead pips stay close. The NDB-30s give you energy fire when you want to save ballistic rounds. Revenants also serve as a great alternative to AD4Bs in the standard starter build.
For a fully energy-based crafted loadout, run 2 × S4 Attrition-4s with 4 × S3 Attrition-3s on an F7A or F7C-M (Super Hornet). Their velocities (1,440 m/s and 1,480 m/s) match closely. You trade away peak burst DPS compared to the Revenant/NDB-30 combination, but every gun recharges. On civilian frames, combine the center S3 Attritions with S4 wing mounts and pick your S2 nose guns separately.
Remember that material quality affects crafted weapon output, so equip each finished weapon before checking its adjusted stats. The SW16BR3 Shredder doesn't displace these choices at its current output. Also, beware of outdated guides suggesting Sledge IVs—there is no S4 Sledge cannon in the game.
Already own the Heartseeker turret?
Keep the TMSB-5 turret's twin S4 ballistic gatlings, mount two S4 AD4Bs on the wings, and throw a pair of S3 GT-220s on the nose. That gives F7C-M Heartseeker owners an all-ballistic fit, so be ready to restock ammunition for every gun. Because the turret is a limited item and can bug out after ship claims, avoid buying the Heartseeker solely under the assumption that insurance will always return the custom mount.
Which components are worth changing?
Start with your factory gear and only swap components when you need specific improvements to power output, cooling, shield regen, or signature suppression.
Shields, power, and cooling
On the F7C-M (Super Hornet), make sure all three shield slots are populated—its three factory AllStops provide a solid 9,504 shield HP. The stock AllStop-class shields on the base F7C and F7A are perfectly fine for general use, so only upgrade if you're chasing faster regen times, lower signatures, or lower power draw. On the F7C-S (Ghost), keep the stock Shimmer shields intact if stealth is your goal—fitting shields for more protection can come at the cost of higher emissions.
Stock power plants and coolers handle the AD4B/Mantis build. Running laser-heavy builds like the M6A/Panther setup requires active power management, but won't strictly force you to buy new hardware. If you earn the Wikelo ship, its JS-400 power plant and Glacier coolers come with the reward.
Quantum drive
Every Mk II Hornet carries 0.90 SCU of quantum fuel. Before upgrading to a faster quantum drive, check whether it has enough range for your common routes. If the stock drive gets you where you need to go, keep it; otherwise, consult our quantum drive guide to balance travel speed against fuel burn.
How to get the F7A Mk II from the Executive Hangar
Trying for an F7A through the Executive Hangar involves hunting down access cards and collecting seven unique circuit boards across Pyro's contested zones. You can solo this run, but card bottlenecks, hostile players, timers, and the threat of losing your hard-earned boards make an organized squad the better choice. Pack extra armor, medpens, and have a clear spawn strategy. Our FPS weapon guide helps you choose guns for the on-foot sections.
The reward loot table features two distinct F7A variants—Executive Military and Executive Stealth—each listed at 5%. Other potential ship drops include the F8C, Corsair, Cutlass Black, Syulen, Guardian MX, Meteor, and Scorpius. That means an F7A drop is far from guaranteed even if you pull off a clean run. Also, remember that only one player can claim the ship reward at the end, so decide on the recipient before socketing your boards.
Get the red and blue access cards
Start by securing two Red Supervisor cards from PYAM-SUPVISR-3-4 or PYAM-SUPVISR-3-5 near PYR3 L4/L5 (you may need to manually locate these locations on your starmap). Note that red keycard printers have roughly a 30-minute cooldown.
Next, grab the Blue Security cards required later in the run from Checkmate and Orbituary. These printers also operate on roughly a 30-minute timer. Remember: red and blue keycards simply clear access barriers; they do not count toward the seven unique boards needed for the final turn-in.
If a keycard printer display freezes at 00:00, CIG recommends force-quitting the game with Alt-F4 and logging back in to restore the display. The keycard printer timer workaround covers that symptom; printing or door failures may remain.
Collect all seven unique boards
| Board | Station | Access route |
|---|---|---|
| 1 | Checkmate | Fuse, then red card |
| 2–3 | Checkmate | Hangar path with red/blue or fuse/blue access |
| 4 | Orbituary | Fuse, red card, then another fuse |
| 5 | Ruin Station | Ghost Arena, Crypt path |
| 6 | Ruin Station | Ghost Arena timed vault |
| 7 | Orbituary | Fuse, red card, fuse, then two blue cards |
At Ruin Station's Ghost Arena, you'll use Crypt, Wasteland, and Last Resort access cards. Follow the Crypt path to secure Board 5. Board 6 sits inside the timed vault, which stays open for roughly one minute before locking down for about 20 minutes—make sure your team is stacked outside the door before starting the cycle.
Assign a dedicated carrier to hold the boards. Having one player carry everything makes tracking simpler, though a single death risks the whole set. If you choose to split boards across squadmates, make sure you have a recovery plan if someone goes down.
Find the active hangar and retrieve the reward
Once you have all seven unique boards, head to the PYAM-EXHANG-0-1 asteroid cluster near Pyro's star. There are three asteroid facilities in the cluster, but only one is active at a time. Before inserting your boards, inspect the external status lights: ensure there are no red lights and at least one green light.
Use the community Executive Hangar tracker to plan your approach, but always verify the facility lights in person—the schedule may not match your server.
Inserting the boards opens the engineering access corridor for roughly 30 minutes. Have your chosen recipient claim the ship reward at the ASOP terminal and retrieve it promptly. After retrieval, the hangar door closes in about 10 minutes, so make sure to launch and fly the reward ship clear before it closes.
Already have an Overdrive Initiative upgrade?
The 2024 Overdrive Initiative awarded qualifying players an F7C Mk II-to-F7A Mk II upgrade token. Applied web-hangar upgrades are permanently account-bound and survive database wipes. Note that the Overdrive Initiative was an event-exclusive reward and is no longer available.
How to get the Wikelo F7C-M (Super Hornet) Mk II
Completing the "Wikelo Navy F7" project awards the Anvil F7 Hornet Mk Wikelo—an F7C-M (Super Hornet) Mk II pre-fitted with military components and a custom Wikelo skin. You receive the ship directly, with no crafting blueprint. Be aware that this route awards the F7C-M, not an F7A.
Pick up the contract at Wikelo's bazaar located in Dasi near Hurston, Selo near Crusader, or Kinga near microTech. There is no F7-specific reputation minimum listed. You will need to turn in the following materials:
| Requirement | Quantity | Where to get it |
|---|---|---|
| Wikelo Favor | 16 | Exchange eligible currency or materials at Wikelo |
| DCHS-05 Orbital Positioning Comp-Board | 3 | Contested-zone progression |
| Ace Interceptor Helmet | 5 | Ace-pilot bodies |
| Government Cartography Agency Medal, Pristine | 1 | Ace-pilot body in patrol mercenary missions |
To earn Wikelo Favor, exchange 50 Council Scrip, 50 MG Scrip, 12 Grade AA Irradiated Valakkar Pearls, or 50 Carinite per Favor token. Simply choose whichever trade path fits your existing inventory.
Note: Older guide versions quoted 20 Favor and six DCHS-05 boards, but current patch requirements stand at 16 Favor and three boards (plus the helmets and pristine medal). Ace pilot bodies can disappear before you secure their helmets, so loot promptly and allow for extra attempts.
Check the counter before handing over the stack
Before handing over rare items, double-check that the project contract is active. All items must be turned in at the same emporium where you accepted the project, using its freight elevator or local inventory kiosk for smaller valuables where possible.
Always test the turn-in system first using a single Wikelo Favor or low-value item. If you're using the elevator, send it down and wait for the mission counter to update. If it doesn't count, stop there. Players have reported losing entire stacks of rare materials without receiving credit or the ship reward.
If items sitting on the elevator platform fail to register, refer to our mission cargo recognition workaround. These steps need accessible boxes and aren't a verified Wikelo fix; they won't retrieve vanished valuables.
Even if your test item registers, the rest of the hand-in can still fail, so watch the counters as you deliver the remaining items. Keep in mind that only the contract holder receives the ship reward, regardless of who helped collect or deliver the materials. Once all requirements show complete, finalize the contract and claim your F7C-M at the local ASOP terminal. If the ship appears on the list but the "Retrieve" button is grayed out, try the grayed-out ASOP Retrieve workaround.
Check the reward's components
The Wikelo F7C-M reward ships with a JS-400 power plant, a VK-00 quantum drive, two Glacier coolers, and at least two FR-66 shield generators. Inspect the third shield slot before taking off: the hull supports three shield generators, but don't assume the reward comes equipped with a third FR-66.
Check the modular weapons after storage or a claim
Nose and top-turret weapons can stop working after storing your ship or filing an insurance claim. Re-equipping weapons at your home station or replacing the affected guns sometimes restores them. If you're planning to claim a damaged ship, removing rare modules beforehand may help you keep them, but it isn't a guaranteed workaround.
The F7C-M (Super Hornet) ball turret's missile rack can also disappear or fail to fit. Check your center missile bay after every claim or storage call, and don't rely solely on missiles for critical encounters. Heartseeker owners should exercise the same caution with the TMSB-5 top turret.
If an unequipped TMSB-5 breaks apart into individual inventory components, check out our turret removal workaround guide. It covers the Alpha 4.9 equip-then-remove failure; whether it helps with 4.10.1 turret failures remains unconfirmed.
If you expect to claim your Hornet frequently, standard store-bought weapons are easier to replace. Above all, check every modular slot after retrieval before flying out to your next fight.
Sources
Ship and component figures use the latest applicable LIVE records for this Alpha 4.10.1 guide; some vehicle records still carry a 4.10.0 label. Shop listings can change, and player-reported workarounds aren't guarantees.
- RSI Alpha 4.10.1 release notes and known issues — build scope and the keycard-printer timer issue.
- RSI's F7C/F7A launch article and F7C-M launch article — variant identity, the historical Overdrive upgrade, and official imagery.
- Star Citizen Wiki's F7C, F7C-S, F7C-R, F7C-M, and F7A records — mounts, components, hull and armor values, handling, fuel, and shop listings.
- Star Citizen Wiki's S3 nose-turret record — military nose-gun sizes and acquisition limits. The center and civilian nose-turret listings are linked in the shopping section above.
- Wikelo Navy F7 and Subliminal's project data — required items, reward identity, and its component package.
- Star Citizen Wiki's Executive Hangar guide and Citizen Starter Guide's reward table — board routes, access conditions, and the two separate 5% F7A entries. Timer descriptions differ, so follow the lights at the base.
- RSI Alpha 4.7 combat changes — the armor and weapon-interaction changes behind the loadout trade-offs.
- Player reports of Wikelo item loss, Hornet nose and turret failures, and ball-turret missile-rack problems — the reported risks and limited mitigations described here.